该篇集群搭建是在我前两篇博文的基础上搭建的
参考官方文档,在Kubernetes上安装:https://kubesphere.io/zh/docs/v3.3/installing-on-kubernetes/introduction/overview/
一、环境准备
1、k8s版本
1-1、官网上说如需在 Kubernetes 上安装 KubeSphere 3.3,您的 Kubernetes 版本必须为:v1.19.x、v1.20.x、v1.21.x、 v1.22.x、 v1.23.x 和 * v1.24.x。带星号的版本可能出现边缘节点部分功能不可用的情况。因此,如需使用边缘节点,推荐安装 v1.21.x 及之前的版本。
我们先看一下自己的版本
[root@k8s-new-master ~]# kubectl versionClient Version: version.Info{Major:"1", Minor:"20", GitVersion:"v1.20.9", GitCommit:"7a576bc3935a6b555e33346fd73ad77c925e9e4a", GitTreeState:"clean", BuildDate:"2021-07-15T21:01:38Z", GoVersion:"go1.15.14", Compiler:"gc", Platform:"linux/amd64"}Server Version: version.Info{Major:"1", Minor:"20", GitVersion:"v1.20.9", GitCommit:"7a576bc3935a6b555e33346fd73ad77c925e9e4a", GitTreeState:"clean", BuildDate:"2021-07-15T20:56:38Z", GoVersion:"go1.15.14", Compiler:"gc", Platform:"linux/amd64"}
1.20.9是符合上面描述的版本的。
1-2、可用 CPU > 1 核;内存 > 2 G。CPU 必须为 x86_64,暂时不支持 Arm 架构的 CPU。
我的虚拟机配置是2核4G也是符合要求的
1-3、Kubernetes 集群已配置默认 StorageClass(请使用 kubectl get sc 进行确认)。
[root@k8s-new-master ~]# kubectl get scNo resources found
这个是空的,不符合要求,得先装一下。
直接准备好yaml,用kubectl命令安装即可
## 创建了一个存储类apiVersion: storage.k8s.io/v1kind: StorageClassmetadata:name: nfs-storageannotations:storageclass.kubernetes.io/is-default-class: "true"provisioner: k8s-sigs.io/nfs-subdir-external-provisionerparameters:archiveOnDelete: "true" ## 删除pv的时候,pv的内容是否要备份---apiVersion: apps/v1kind: Deploymentmetadata:name: nfs-client-provisionerlabels:app: nfs-client-provisioner# replace with namespace where provisioner is deployednamespace: defaultspec:replicas: 1strategy:type: Recreateselector:matchLabels:app: nfs-client-provisionertemplate:metadata:labels:app: nfs-client-provisionerspec:serviceAccountName: nfs-client-provisionercontainers:- name: nfs-client-provisionerimage: registry.cn-hangzhou.aliyuncs.com/lfy_k8s_images/nfs-subdir-external-provisioner:v4.0.2# resources:# limits:# cpu: 10m# requests:# cpu: 10mvolumeMounts:- name: nfs-client-rootmountPath: /persistentvolumesenv:- name: PROVISIONER_NAMEvalue: k8s-sigs.io/nfs-subdir-external-provisioner- name: NFS_SERVERvalue: 192.168.192.8 ## 指定自己nfs服务器地址- name: NFS_PATHvalue: /nfs/data ## nfs服务器共享的目录volumes:- name: nfs-client-rootnfs:server: 192.168.192.8 ## 指定自己nfs服务器地址path: /nfs/data---apiVersion: v1kind: ServiceAccountmetadata:name: nfs-client-provisioner# replace with namespace where provisioner is deployednamespace: default---kind: ClusterRoleapiVersion: rbac.authorization.k8s.io/v1metadata:name: nfs-client-provisioner-runnerrules:- apiGroups: [""]resources: ["nodes"]verbs: ["get", "list", "watch"]- apiGroups: [""]resources: ["persistentvolumes"]verbs: ["get", "list", "watch", "create", "delete"]- apiGroups: [""]resources: ["persistentvolumeclaims"]verbs: ["get", "list", "watch", "update"]- apiGroups: ["storage.k8s.io"]resources: ["storageclasses"]verbs: ["get", "list", "watch"]- apiGroups: [""]resources: ["events"]verbs: ["create", "update", "patch"]---kind: ClusterRoleBindingapiVersion: rbac.authorization.k8s.io/v1metadata:name: run-nfs-client-provisionersubjects:- kind: ServiceAccountname: nfs-client-provisioner# replace with namespace where provisioner is deployednamespace: defaultroleRef:kind: ClusterRolename: nfs-client-provisioner-runnerapiGroup: rbac.authorization.k8s.io---kind: RoleapiVersion: rbac.authorization.k8s.io/v1metadata:name: leader-locking-nfs-client-provisioner# replace with namespace where provisioner is deployednamespace: defaultrules:- apiGroups: [""]resources: ["endpoints"]verbs: ["get", "list", "watch", "create", "update", "patch"]---kind: RoleBindingapiVersion: rbac.authorization.k8s.io/v1metadata:name: leader-locking-nfs-client-provisioner# replace with namespace where provisioner is deployednamespace: defaultsubjects:- kind: ServiceAccountname: nfs-client-provisioner# replace with namespace where provisioner is deployednamespace: defaultroleRef:kind: Rolename: leader-locking-nfs-client-provisionerapiGroup: rbac.authorization.k8s.io
执行
kubectl apply -f sc.yaml
再查看
root@k8s-new-master ~]# kubectl get scNAME PROVISIONER RECLAIMPOLICY VOLUMEBINDINGMODE ALLOWVOLUMEEXPANSION AGEnfs-storage (default) k8s-sigs.io/nfs-subdir-external-provisioner Delete Immediate false 30s[root@k8s-new-master ~]#
目前也已经有了,可以进行搭建了。
我们这里最好再安装一个集群监控指标组件
2、metrics-server
集群指标监控组件
apiVersion: v1kind: ServiceAccountmetadata:labels:k8s-app: metrics-servername: metrics-servernamespace: kube-system---apiVersion: rbac.authorization.k8s.io/v1kind: ClusterRolemetadata:labels:k8s-app: metrics-serverrbac.authorization.k8s.io/aggregate-to-admin: "true"rbac.authorization.k8s.io/aggregate-to-edit: "true"rbac.authorization.k8s.io/aggregate-to-view: "true"name: system:aggregated-metrics-readerrules:- apiGroups:- metrics.k8s.ioresources:- pods- nodesverbs:- get- list- watch---apiVersion: rbac.authorization.k8s.io/v1kind: ClusterRolemetadata:labels:k8s-app: metrics-servername: system:metrics-serverrules:- apiGroups:- ""resources:- pods- nodes- nodes/stats- namespaces- configmapsverbs:- get- list- watch---apiVersion: rbac.authorization.k8s.io/v1kind: RoleBindingmetadata:labels:k8s-app: metrics-servername: metrics-server-auth-readernamespace: kube-systemroleRef:apiGroup: rbac.authorization.k8s.iokind: Rolename: extension-apiserver-authentication-readersubjects:- kind: ServiceAccountname: metrics-servernamespace: kube-system---apiVersion: rbac.authorization.k8s.io/v1kind: ClusterRoleBindingmetadata:labels:k8s-app: metrics-servername: metrics-server:system:auth-delegatorroleRef:apiGroup: rbac.authorization.k8s.iokind: ClusterRolename: system:auth-delegatorsubjects:- kind: ServiceAccountname: metrics-servernamespace: kube-system---apiVersion: rbac.authorization.k8s.io/v1kind: ClusterRoleBindingmetadata:labels:k8s-app: metrics-servername: system:metrics-serverroleRef:apiGroup: rbac.authorization.k8s.iokind: ClusterRolename: system:metrics-serversubjects:- kind: ServiceAccountname: metrics-servernamespace: kube-system---apiVersion: v1kind: Servicemetadata:labels:k8s-app: metrics-servername: metrics-servernamespace: kube-systemspec:ports:- name: httpsport: 443protocol: TCPtargetPort: httpsselector:k8s-app: metrics-server---apiVersion: apps/v1kind: Deploymentmetadata:labels:k8s-app: metrics-servername: metrics-servernamespace: kube-systemspec:selector:matchLabels:k8s-app: metrics-serverstrategy:rollingUpdate:maxUnavailable: 0template:metadata:labels:k8s-app: metrics-serverspec:containers:- args:- --cert-dir=/tmp- --kubelet-insecure-tls- --secure-port=4443- --kubelet-preferred-address-types=InternalIP,ExternalIP,Hostname- --kubelet-use-node-status-portimage: registry.cn-hangzhou.aliyuncs.com/lfy_k8s_images/metrics-server:v0.4.3imagePullPolicy: IfNotPresentlivenessProbe:failureThreshold: 3httpGet:path: /livezport: httpsscheme: HTTPSperiodSeconds: 10name: metrics-serverports:- containerPort: 4443name: httpsprotocol: TCPreadinessProbe:failureThreshold: 3httpGet:path: /readyzport: httpsscheme: HTTPSperiodSeconds: 10securityContext:readOnlyRootFilesystem: truerunAsNonRoot: truerunAsUser: 1000volumeMounts:- mountPath: /tmpname: tmp-dirnodeSelector:kubernetes.io/os: linuxpriorityClassName: system-cluster-criticalserviceAccountName: metrics-servervolumes:- emptyDir: {}name: tmp-dir---apiVersion: apiregistration.k8s.io/v1kind: APIServicemetadata:labels:k8s-app: metrics-servername: v1beta1.metrics.k8s.iospec:group: metrics.k8s.iogroupPriorityMinimum: 100insecureSkipTLSVerify: trueservice:name: metrics-servernamespace: kube-systemversion: v1beta1versionPriority: 100
二、安装KubeSphere
1、下载核心文件
wget https://github.com/kubesphere/ks-installer/releases/download/v3.1.1/kubesphere-installer.yamlwget https://github.com/kubesphere/ks-installer/releases/download/v3.1.1/cluster-configuration.yaml
如果下载不到,请用下面的地址
wget https://www.suibibk.com//fileupload/files/kubesphere-installer.yamlwget https://www.suibibk.com//fileupload/files/cluster-configuration.yaml
2、修改cluster-configuration
在 cluster-configuration.yaml中指定我们需要开启的功能
参照官网“启用可插拔组件”
https://kubesphere.io/zh/docs/v3.3/pluggable-components/
3、执行安装
kubectl apply -f kubesphere-installer.yamlkubectl apply -f cluster-configuration.yaml
4、查看安装进度
kubectl logs -n kubesphere-system $(kubectl get pod -n kubesphere-system -l app=ks-install -o jsonpath='{.items[0].metadata.name}') -f
要过一会才能查看到进度
**************************************************Waiting for all tasks to be completed ...task network status is successful (1/11)task alerting status is successful (2/11)task multicluster status is successful (3/11)task openpitrix status is successful (4/11)task auditing status is successful (5/11)task logging status is successful (6/11)task events status is successful (7/11)task kubeedge status is successful (8/11)task devops status is successful (9/11)task monitoring status is successful (10/11)...
貌似要等挺久的呢,等待中…
**************************************************Collecting installation results ...######################################################## Welcome to KubeSphere! ########################################################Console: http://192.168.192.8:30880Account: adminPassword: P@88w0rd
我能说等了差不多一个钟么,我以为坏掉了呢!可能是我的本地配置太垃圾了,尝试访问下。
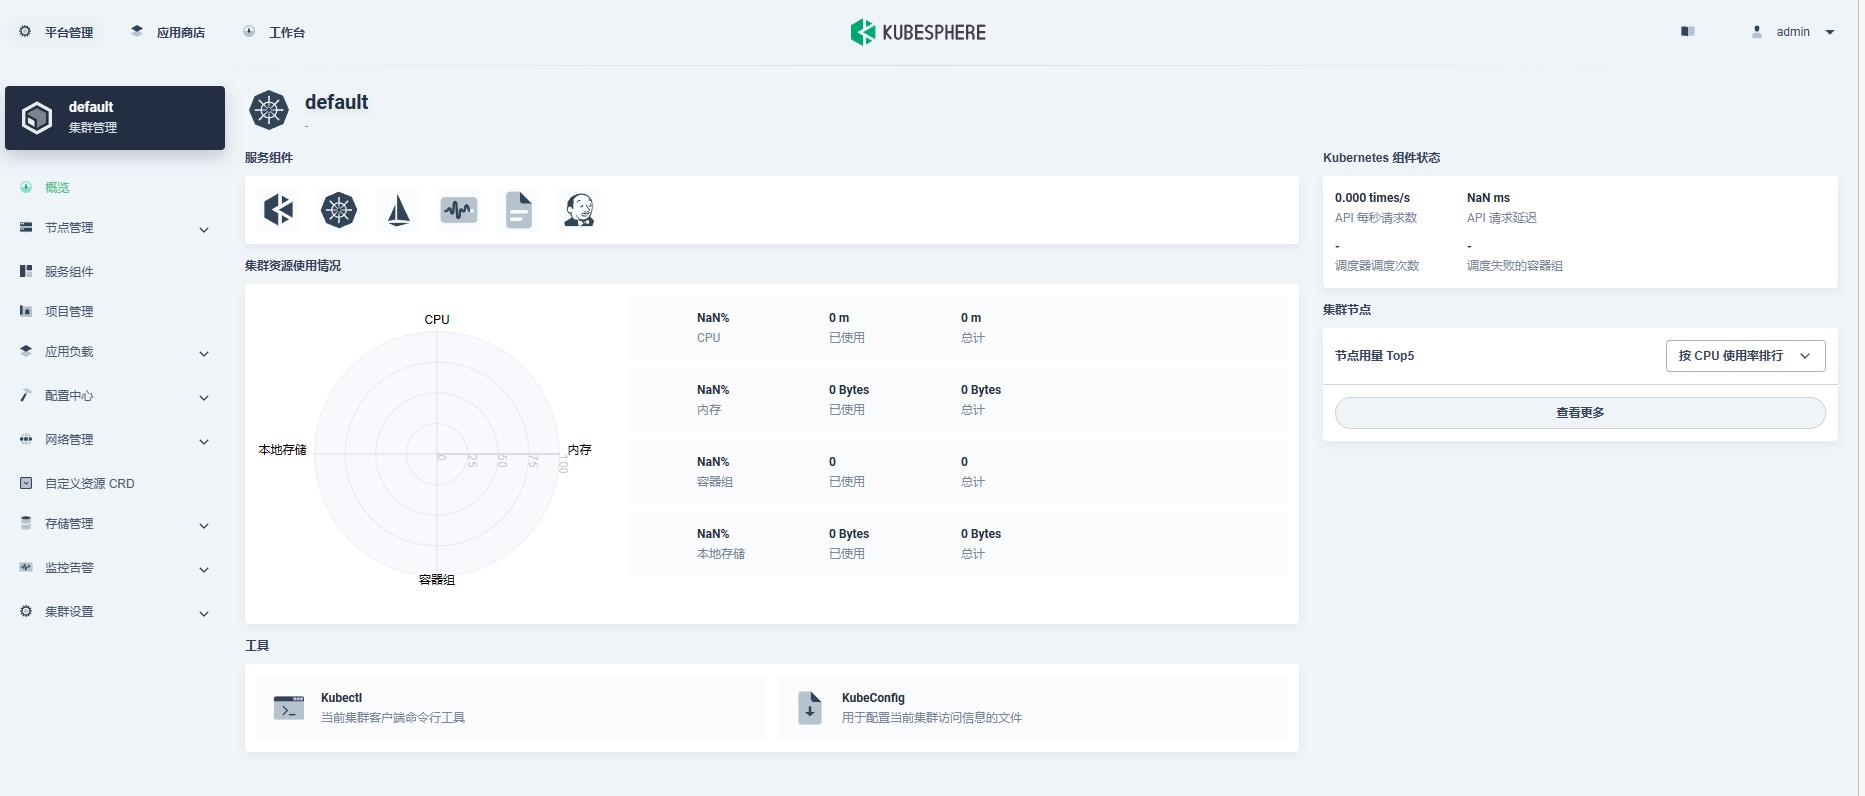
5、访问登录
登录后,我把密码改为了:Abc123

也就是后面实战的登录为
Console: http://192.168.192.8:30880Account: adminPassword: Abc123
参考
1、视频教程
https://www.bilibili.com/video/BV13Q4y1C7hS
2、笔记
https://www.yuque.com/leifengyang/oncloud/


